Blender Oat Pancakes

These one step blender oat pancakes (gluten-free and vegan!) came about because I kind of dislike (read; loathe) doing dishes. 

A couple of weekends ago we had a completely free Saturday. No plans! You know what that means?! 

Pancakes! 

I love lazy Saturday mornings, still in my pjs at 11 am, coffee, podcasts and my favourite brunch food; pancakes. 

I gathered all my pancake gear ; bowls, spatulas, measuring cups – and then I had an idea! What if I made the batter sans bowl?! Cue blender. 

This blender oat pancake recipe is revolutionary! 

Everything is made in one step in the blender!

One step, fewer dishes and less time! 

The recipe is so easy and pouring the batter from the blender container allows for less mess and no fiddling with spoons and ladles.

Not only are these gluten free pancakes quick, easy and convenient, we’re cutting corners without sacrificing any of the nutrition. 

It’s also pretty versatile. I made this version with oats, but I tried it again with buckwheat and it was equally delicious! You could get really crazy and add different berries to the batter to get different colour pancakes. Kiddos would have a blast with this!

I smothered these blender oat pancakes with some Almond Butter Caramel from The Plant-Based Cookbook and topped them with whatever fresh fruit I had on hand.

It was so dreamy and delicious! And only a handful of dishes! 

These pancakes freeze great too! Layer them in a freezer safe container and separate the layers with parchment. When you want to reheat, just pop them in the oven or even the toaster!

We didn’t have any leftovers because we’re pancake gluttons! However, the odd time we have a few leftover, I like to keep them in the fridge and the next morning I reheat them in the oven and make warm pancake sandwiches! I spread some nut butter between two pancakes along with sliced banana and raspberry chia jam and eat it like a sandwich! 

Cmon! So yum!

Here’s a good place to talk about the sweeteners we pour over our pancakes. You see pancakes, like so many other carb-y foods, get a really bad health reputation because of the stuff we put on them!

When we smother pancakes in maple syrup, chocolate chips, butter or other high sugar/high fat ingredients, we’re decreasing their nutritional value and making them more suitable for dessert than breakfast. 

The first assessment should be your syrup. Please throw out the “light” or “low calorie” syrups. 

These are FAR worse for you than original and authentic maple syrup. 

I pulled a bottle of “light” Aunt Jemima out of the cupboard – not mine, my parents! – and the first ingredient in this famous syrup is liquid sugar. You read correctly. 

Throw in some caramel colour, artificial flavouring and six-syllable preservatives and you have what most people think is maple syrup. The only place this stuff belongs is in your garbage!

If you do wish to use a syrup, choose real maple syrup and, even then, limit it to a few tablespoons or less. Measure this out, you’ll be shocked at how little a few tablespoons actually is. 

I too like to have some kind of tasty sauce and added sweetness on my pancakes but I side step all the sugar by topping these gluten free banana oat pancakes with Almond Cream (made from almond butter, almond milk and a little sweetener) and Raspberry Chia Jam. Fresh fruit also adds a lot of sweetness as does adding berries directly to the batter. 

So, the next time you whip up a batch of pancakes (hopefully you give these a shot), limit your syrup and choose fresh fruit! 

Avoid these pancake mistakes!

  • Having the pan too hot! If your pan is too hot, you run the risk of cooking the outside of the pancakes while the middle is still mushy and undercooked. Slow and steady wins the pancake race. 
  • Flipping too early. Wait until you see bubbles across the entire surface of the pancake before flipping. It’s hard to put a time frame on this because it depends on your pan, heat and size of pancake. 
  • Not using the right pan! You can use a regular sauté pan when sautéing for soups or savoury dishes without oil by adding water instead. But, if you want to make oil-free pancakes, there will be sticking! So the solution is either to lightly grease the pan or get a good-quality non-stick pan and avoid using metal utensils. 
  • Letting them get cold. Preheat your oven to the lowest heat setting, use your warming drawer if you have one, or keep cooked pancakes tightly sealed in a container when they’re done to keep them warm. Cold pancakes aren’t as appealing as those straight off the pan. Don’t use the microwave…um for anything.
  • Leaving the batter sitting too long. Leavening agents like baking powder start working right away and you want to benefit from the “fluff” factor they contribute to your pancakes. It’s best to make the batter and get to work within 5-10 minutes of mixing the batter. If left too long (like an hour), the batter will thicken and likely result in heavier pancakes with mushy middles (not a bad thing, just FYI).

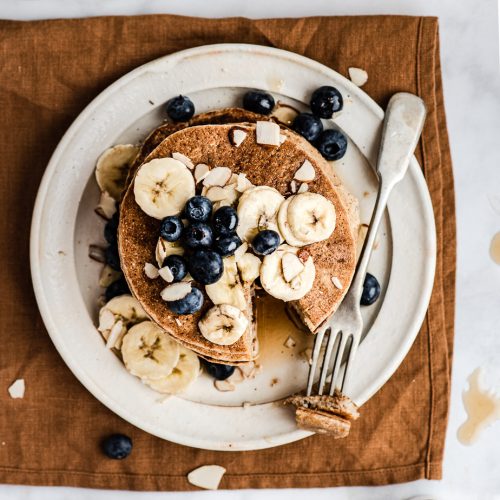
Vegan Blender Oat Pancakes

Author : Ashley Madden
Prep Time: 30 mins
Servings: 10 pancakes
Course: Breakfast
Cuisine: American
5 from 4 votes
Saturday morning must-have! These vegan and gluten-free blender banana oat pancakes are designed for easy pancake clean up!

Equipment

  • Non-Stick Sauté Pan

Ingredients
  

  • 1 large very ripe banana ~1 heaping cup chopped
  • 2 cups gluten free old fashioned rolled oats (not quick cooking)
  • 1¼ to 1½ cups almond milk plus more if needed
  • 1 tablespoon ground flaxseed
  • 1 tablespoon lemon juice
  • 2 teaspoons vanilla extract
  • 2 teaspoons baking powder
  • ½ teaspoon cinnamon
  • ¼ teaspoon salt
  • Optional Sweetener: 2 pitted medjool dates or 2 tablespoons coconut palm sugar

Instructions
 

  • Add all ingredients in order listed to a blender (starting with 1¼ cups almond milk) and blend on high until ingredients are combined. Add more almond milk 1 tablespoon at a time to thin the batter if needed. Less milk makes for thicker pancakes so adjust accordingly. Set aside (keep batter in the blender container).
  • Warm a large non-stick pan on low-medium heat. Pour about ⅓ cup of the batter onto the pan for each pancake. You can eyeball this and feel free to make them bigger or smaller, depending on your preference.
  • Cook each pancake until bubbles form across the surface of the batter (3-5 minutes). Flip and cook on the other side for another 2-3 minutes. Transfer the cooked pancakes to a warming tray or oven (set to low heat to keep them warm) until all the pancakes are cooked.
  • Serve with Almond Butter Caramel (from The Plant-Based Cookbook), Chia Jam, berries, bananas, chia seeds, hemp seeds or ground flax and your choice of sweetener (if using).

Notes

  • These freeze well. Let them cool completely and then place in a freezer safe container. Keep layers separated by parchment paper so they don't stick together.
  • As the batter sits it will thicken. Add more almond milk (1 tablespoon at a time) and re-blend to achieve a pourable consistency.
Did you make this recipe? Tag @riseshinecook on Instagram or hashtag it #riseshinecook

Recipe hack: I’m not sure we can hack this recipe anymore than we already have but there are some quick ways you can switch it up and keep this banana oat pancake recipe fresh! Try adding 1 cup of blueberries to the batter (after it’s already been blended), add 1-2 tablespoons of cocoa to make chocolate pancakes, or add 2 tablespoons of peanut butter (or almond butter) to the batter and blend and then add ½-1 cup raspberries to the better to make PB&J pancakes.

Speaking of pans…I like to use a non-stick pan for pancakes because I prefer to cook without using any oils. The key to cooking safely with non-stick pans is to keep the heat in the low to medium range and never use metal utensils on the pan. You want to avoid any scratches. If you prefer to use oil for this recipe, I suggest adding 1-2 teaspoons of coconut oil to the pan and warm on low. Once the oil is melted, swirl it around the pan and proceed with your pancakes. 

16 Comments

  1. Reply

    Sarah

    December 9, 2020

    Hi Ashley, thank you for the great recipe, I will try these out! One question I had is whether you would out the oata first and grind them down a bit or does this happen anyway when you blend the batter?

    • Reply

      Ashley Madden

      December 10, 2020

      Hi Sarah,

      I put the oats in the blender with everything else, whole. And they blend up nicely! So nope, no need to grind before!

      Happy pancake making 🙂

      Ash

  2. Reply

    Karyn

    February 13, 2021

    5 stars
    These are delicious! I can see this being my go to pancake recipe! Thanks for another yummy recipe.

    • Reply

      Ashley Madden

      February 13, 2021

      Thanks, Karyn! These are pur go-to as well! I’m so glad you enjoyed them 🙂

      Ashley

  3. Reply

    Heidi

    July 31, 2021

    5 stars
    I loved these. I might try them with applesauce instead of banana or raw zucchini. We have many in our family that do not like banana in pancakes or bread.

    • Reply

      Ashley Madden

      July 31, 2021

      Hi Heidi! I love these ideas! Applesauce for sure would be so good… I might try this one 🙂
      Thx for the feedback!

      Ashley

  4. Reply

    Melody

    October 5, 2021

    Can you use oat flour instead of rolled oats?

    • Reply

      Ashley Madden

      October 6, 2021

      Yes, you can. I would use about 1 3/4 cups flour. You might need to adjust the milk (sometimes the particular oat flour used can affect the texture). Add all ingredients to the blender and blend. You won’t have to blend as long either! Happy pancakes making 🙂

      Ashley

  5. Reply

    Tiffany

    February 9, 2022

    Can you use maple syrup or honey instead of sugar? If so, how much should I use?

    • Reply

      Ashley Madden

      February 10, 2022

      Yes, you certainly can! I would use an equal amount of maple syrup. You can also omit the sweetener altogether from the recipe and sweeten with the maple syrup used when serving!
      I hope you enjoy these pancakes!
      – Ashley

  6. Reply

    Valerie

    March 4, 2023

    5 stars
    I’ve made these twice already. My husband and son loved them! I used date sugar in the batter instead of dates or coconut sugar and topped them with a mixed berry jam (using your recipe for basic raspberry chia jam! yum!) My one issue is that I always seem to have trouble getting the center to cook through; the bubbles never seem to form before the underside gets too dark. (regardless they’re delicious) Any suggestions?

    • Reply

      Ashley Madden

      March 5, 2023

      Thanks Valerie! Yes, two tips. First, give the pan a gentle shake to thin the pancake. If it’s too thick it’ll be hard to get the middle cooked without burning the outside. Second, making smaller pancakes, maybe 1/4 cup batter for each, will help for quicker and more even cooking. If you’ve tried this still with no luck, let me know 🙂

      Ashley

  7. Reply

    Amanda

    May 24, 2023

    5 stars
    Best pancakes ever! They even puffed up beautifully. Kids and all loved this recipe. I topped with your berry chia pudding and omg! Amazing, thank you.

    • Reply

      Ashley Madden

      May 24, 2023

      Thank you for sharing Amanda! I love the chia pudding addition too 🙂 So good!

      Ashley

  8. Reply

    Robyn

    July 22, 2023

    Hi there!

    Loved the flavor, but couldn’t get them to cook through even after thinning and trying them on a griddle at both 325 and 375 degrees. Any other tips?

    • Reply

      Ashley Madden

      July 22, 2023

      Hi Robyn! Oh no sorry to hear that. Ok so a couple of things to think about. Low and slow cooking is ideal. How long did you leave them before flipping? About 5 minutes should be adequate. Then I’d try shaking the pan a little to spread them more, so the center isn’t so thick. And then finally, when I can’t get a pancake to cook right, I make them smaller. Use about 1/4 cup of batter with the tips above in mind. I hope this helps! Sorry, it’s so frustrating when a recipe doesn’t deliver! I wish I could come cook them with you!!
      -Ashley

Leave a Reply to Tiffany / Cancel Reply

Recipe Rating